> ## Documentation Index
> Fetch the complete documentation index at: https://developers.kajabi.com/llms.txt
> Use this file to discover all available pages before exploring further.
# Go live in a Course
> Add a live video session to Courses to engage with customers.
Engage with your course customers with regularly scheduled live sessions. With **Course Live Video**, you can design your course with a live session to recap the lessons they have learned and develop a course that includes weekly workshops.
With Live Video in a Course, you can create a product that serves your customers, strengthens your curriculum, and reinforces the value you have to offer.
### Customer experience
Creating a live session in your course will display the course live video section at the top of your course outline.
Your customers can view your live session by opening the Categories tab within their course.
## Go live in a Course
### Add a live video to a course
To add a live video to a Course:
1. Open the **Products** tab from your Dashboard.
2. Select **Courses**.
3. Open an existing course or [create a new course](../../products/courses/courses-overview).
4. Click **Settings** from your Course.
5. Click **Provide a live video session for this course**.
6. Enter the Title, Session Description, and Schedule.
**Note:**
Adding a schedule can help set expectations for when your course customers can join your sessions. An email can be sent to notify your customers whenever you join your live session.
7. Click **Save** to create your live video session:
**Note:**
Adding a schedule to your live video details can provide structure for your customers taking your course to easily understand when they can join your live video session(s). However, you can go live whenever you want, even if it is not stated in your schedule. By starting your live video session, you have the option to have an email sent notifying your customers that you have started a live video session.
### Start a live video session
Start your live video session and notify your course customers that they can join your session.
To go live in your course live video:
1. Open the **Products** tab from your Dashboard.
2. Select **Courses**.
3. Open the course with your live video session.
4. Click **Go live** in the Course Live Video card.
* Select **Yes, notify** to notify your course customers through an email notification with a link to join your live session in the pop-up modal.
* Select **No, just go live** to start your live session without sending an email notification to your course customers.
**Note:**
Live sessions are limited to 200 participants.
### Customize live session settings
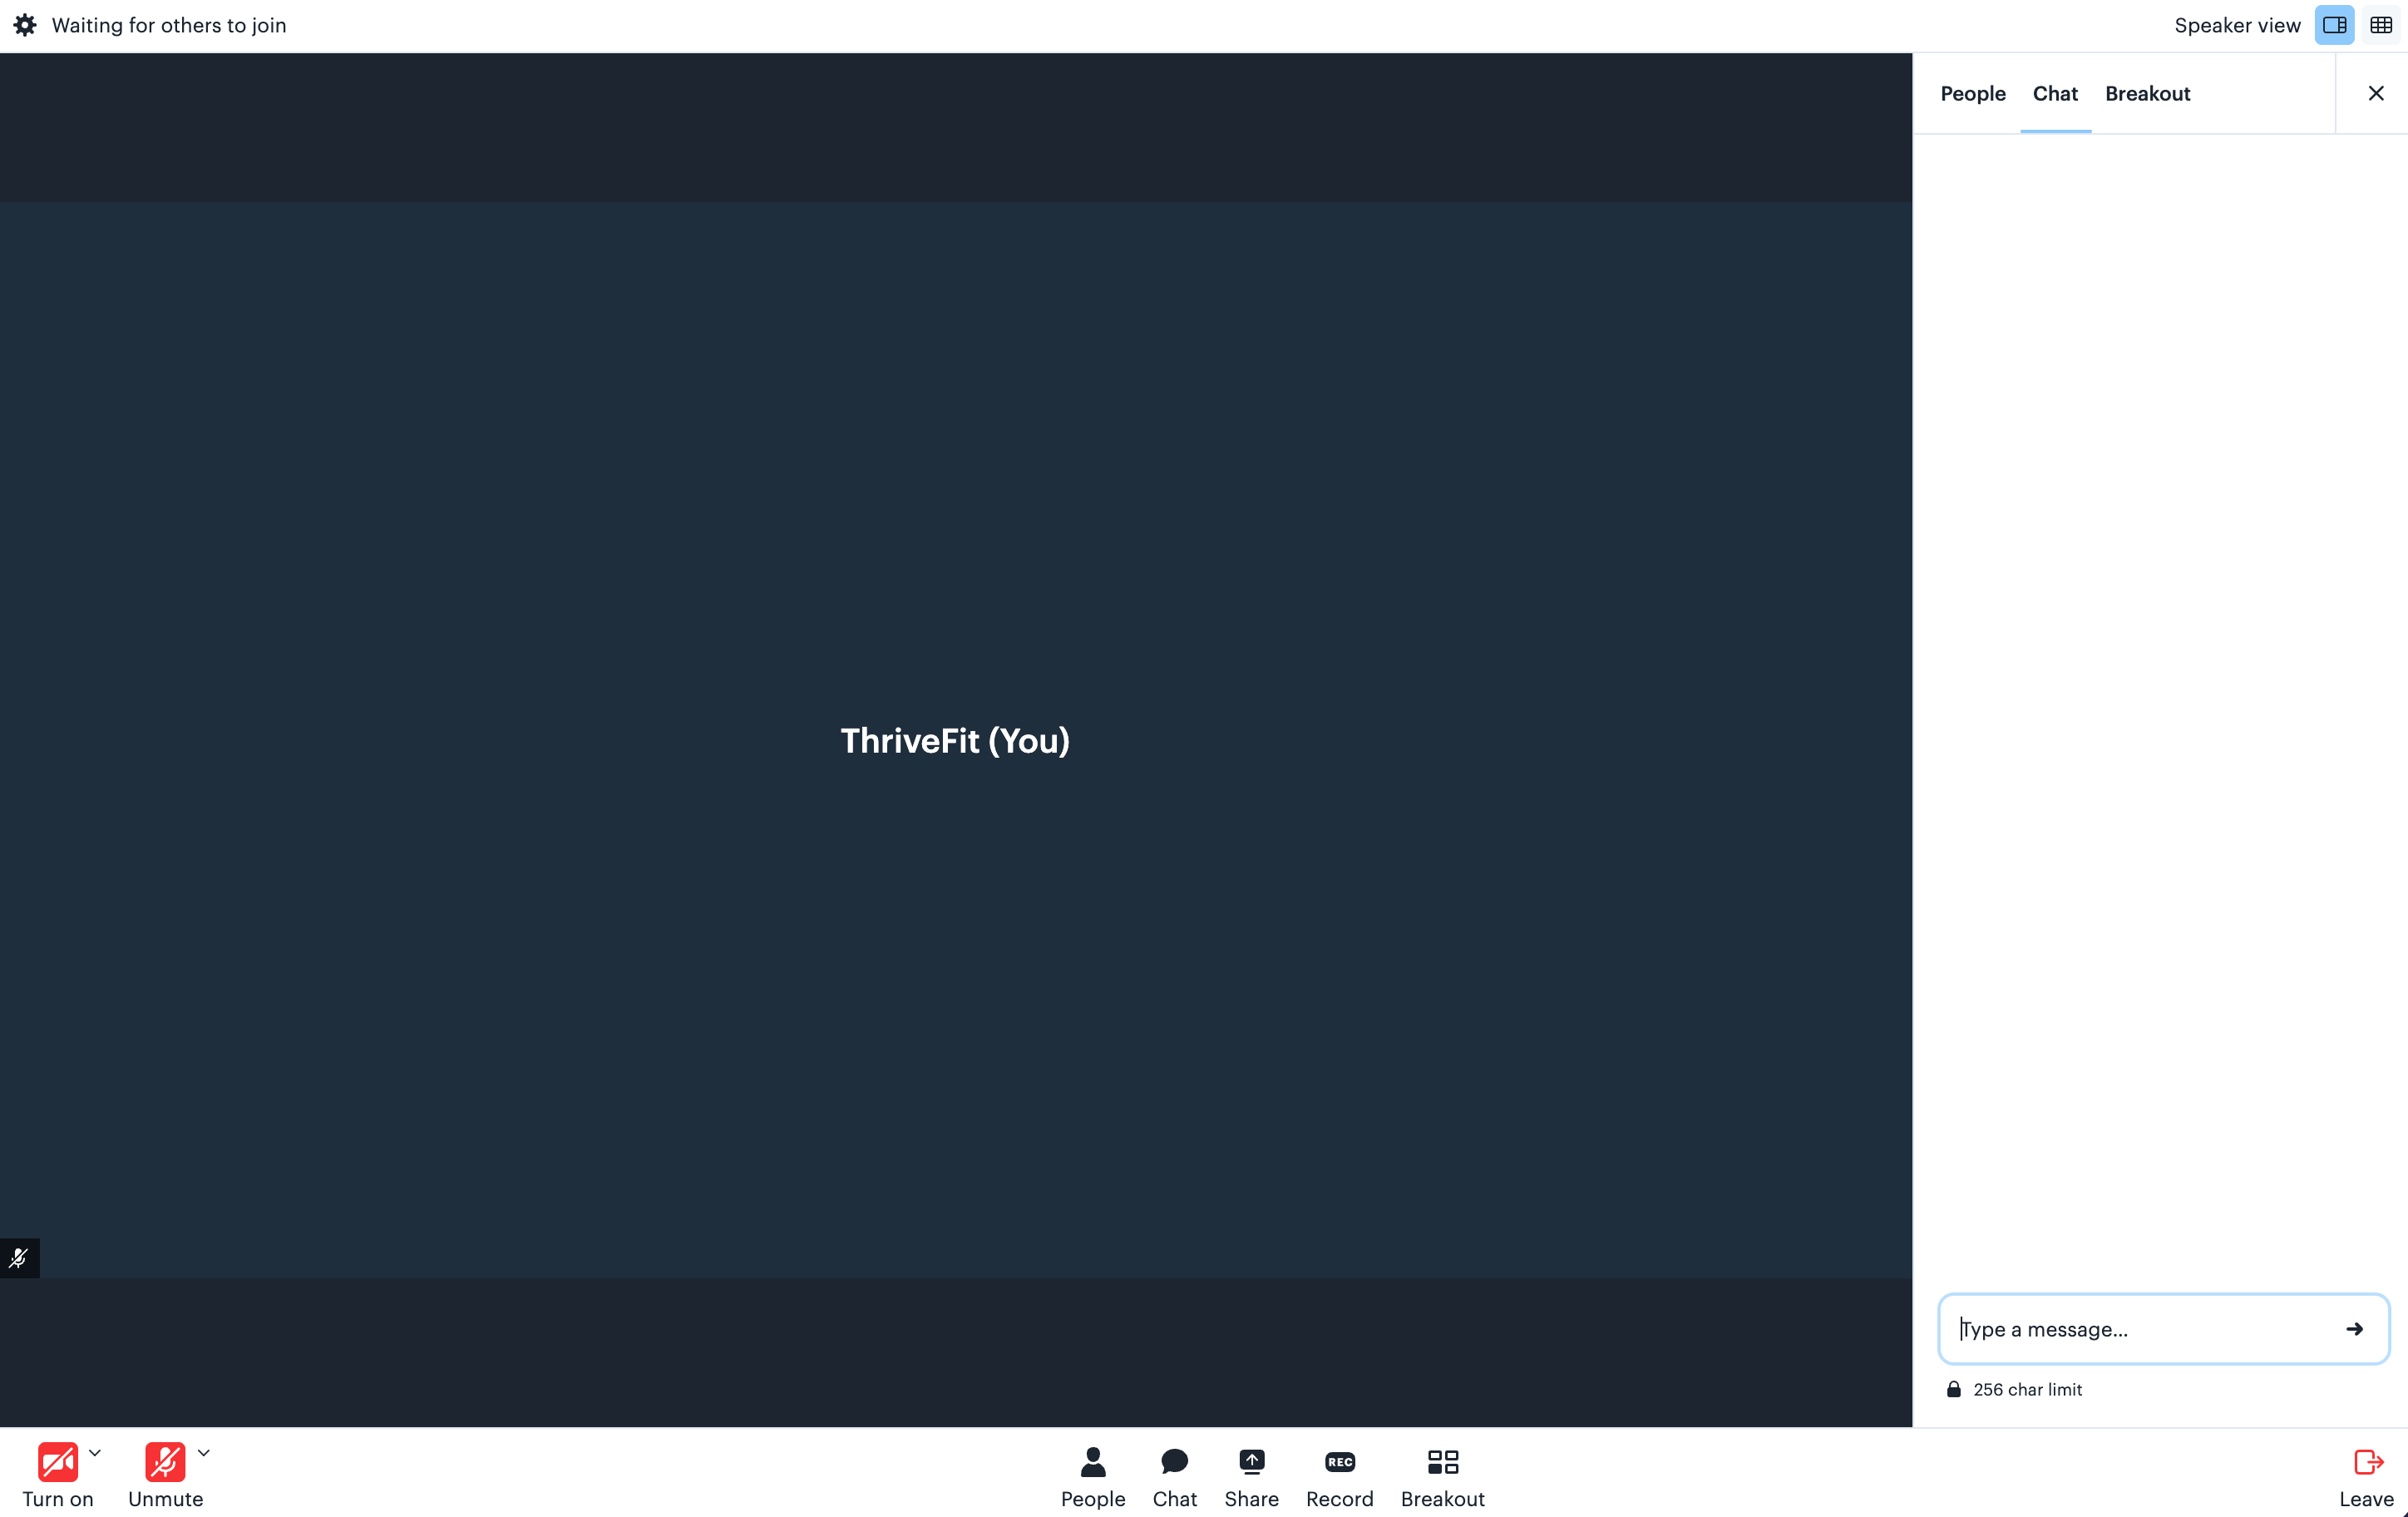
As an admin, you can customize your live video session settings. Adjust your camera, microphone, video settings, and more to customize your customer's experience with your live session.
### Camera
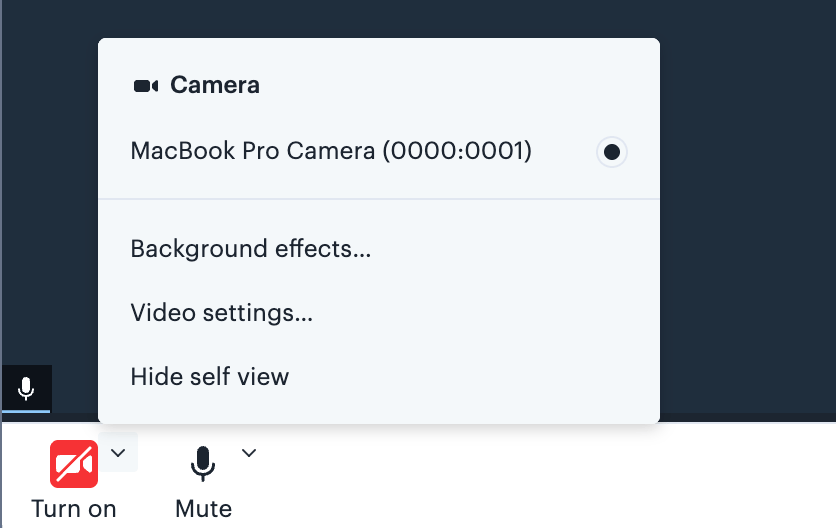
Your camera control sits at the bottom left of the live session. Click **Turn on** or **Turn off** to start or stop your video.
Click the arrow beside the camera control for more options: choose which camera to use, open **Background effects...** to set a background, open **Video settings...**, or select **Hide self view** to hide your own video tile from your screen.
 ### Microphone
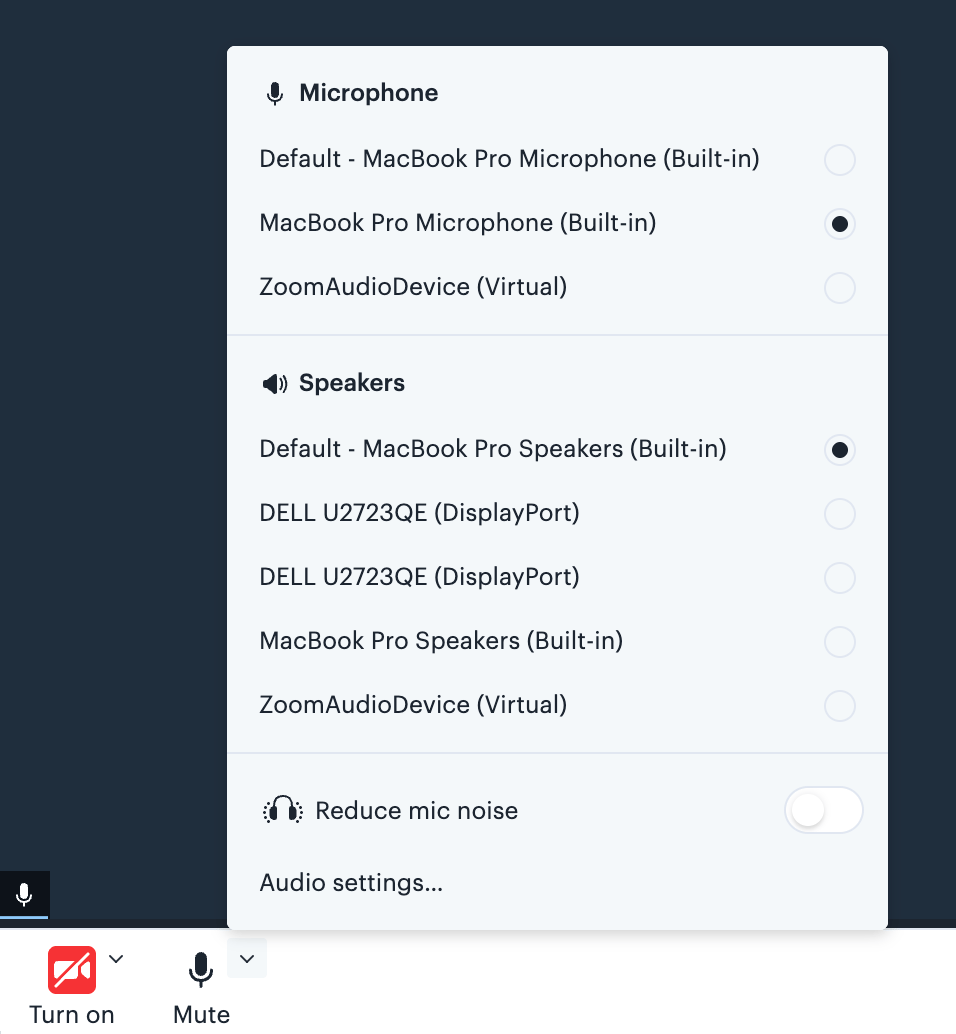
Your microphone control sits beside your camera control. Click **Mute** or **Unmute** to control whether your customers can hear you.
Click the arrow beside the microphone control for more options: choose your input device under **Microphone**, choose your output device under **Speakers**, turn on **Reduce mic noise** to dampen background sound, or open **Audio settings...**.
### Microphone
Your microphone control sits beside your camera control. Click **Mute** or **Unmute** to control whether your customers can hear you.
Click the arrow beside the microphone control for more options: choose your input device under **Microphone**, choose your output device under **Speakers**, turn on **Reduce mic noise** to dampen background sound, or open **Audio settings...**.
 ### Share
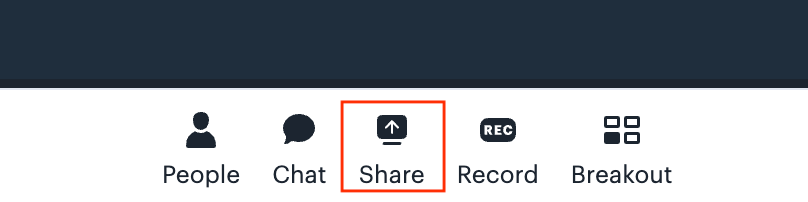
Click **Share** to present your screen to your course customers.
### Share
Click **Share** to present your screen to your course customers.
 ### Record
**Note:**
Be sure to ask your live session participants for permission to record them before you start recording.
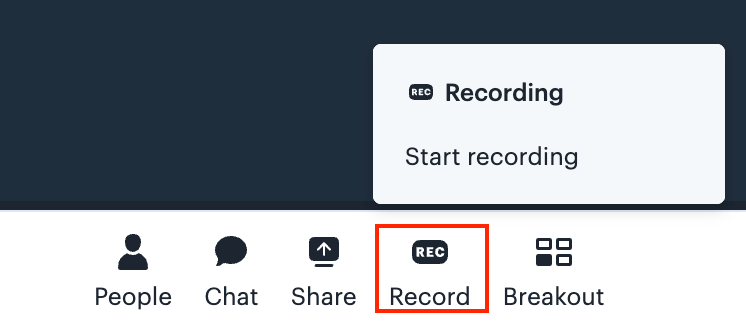
Click **Record**, then select **Start recording**:
### Record
**Note:**
Be sure to ask your live session participants for permission to record them before you start recording.
Click **Record**, then select **Start recording**:
 **Tip:**
Lighting can make or break the quality of your video, so record in a well-lit room. Check your connection strength before you begin recording.
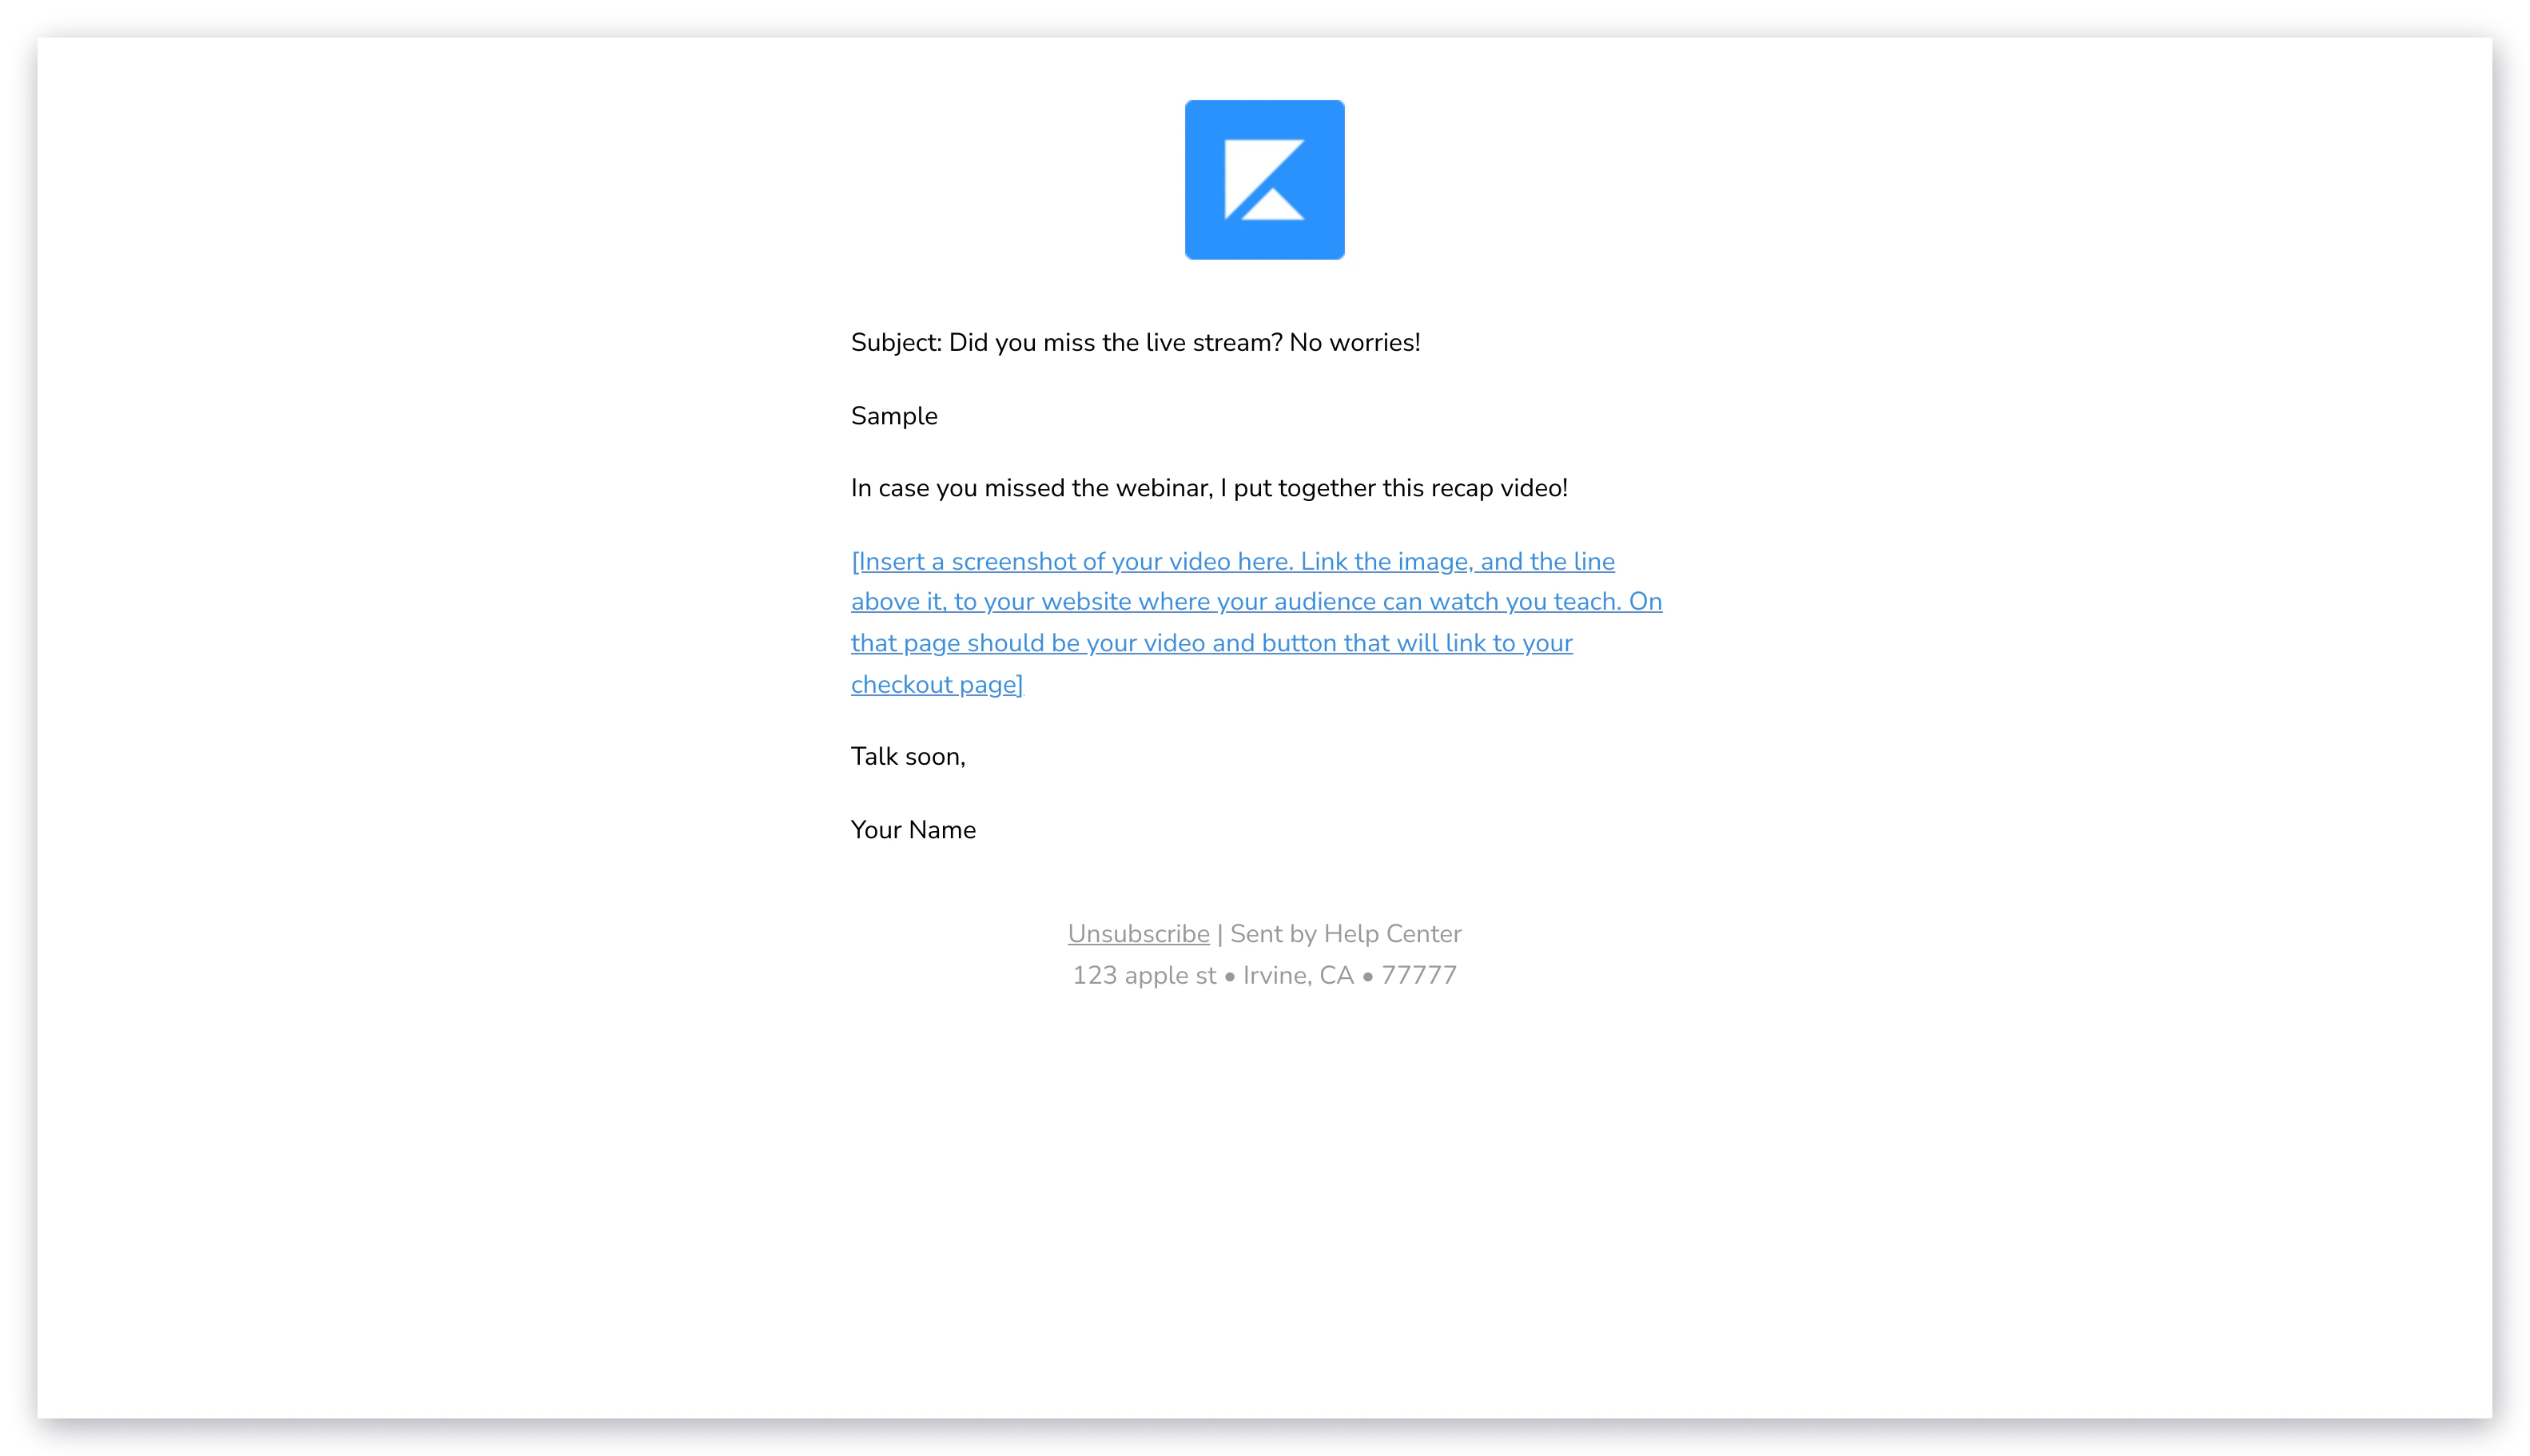
After your live session recording has ended, you will receive an email to your account email address from Kajabi containing your recording file, details, and a link to go to your course and access your recording.
Download the recording from your email or go to your course to access your recording.
Example email with recording file:
**Tip:**
Lighting can make or break the quality of your video, so record in a well-lit room. Check your connection strength before you begin recording.
After your live session recording has ended, you will receive an email to your account email address from Kajabi containing your recording file, details, and a link to go to your course and access your recording.
Download the recording from your email or go to your course to access your recording.
Example email with recording file:
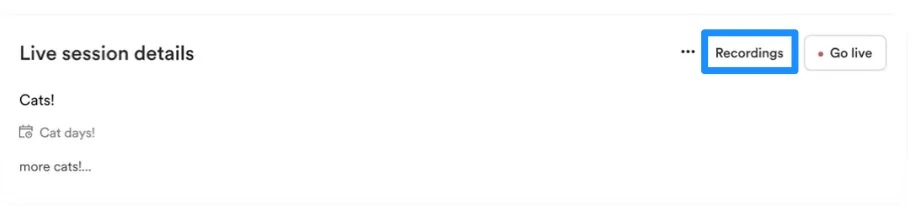
 With your recorded video, you can create a new course lesson by clicking **Recordings**:
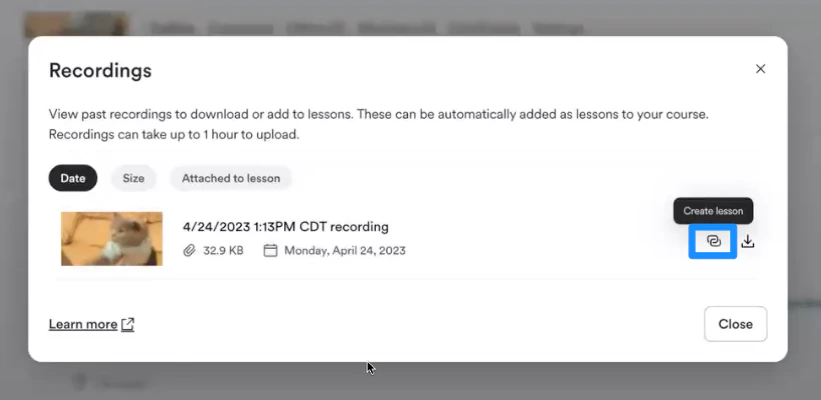
 Then, select **Create lesson**:
 Want to automatically upload your recording to a lesson and auto-publish your lesson?
Configure your Live Room Recordings settings in your Course Settings tab to enable automatic uploads and auto-publishing:
Want to automatically upload your recording to a lesson and auto-publish your lesson?
Configure your Live Room Recordings settings in your Course Settings tab to enable automatic uploads and auto-publishing:
### Chat
Click **Chat** to open the chat panel and send a message to everyone in the session. Chat messages are limited to 256 characters.
 ### People
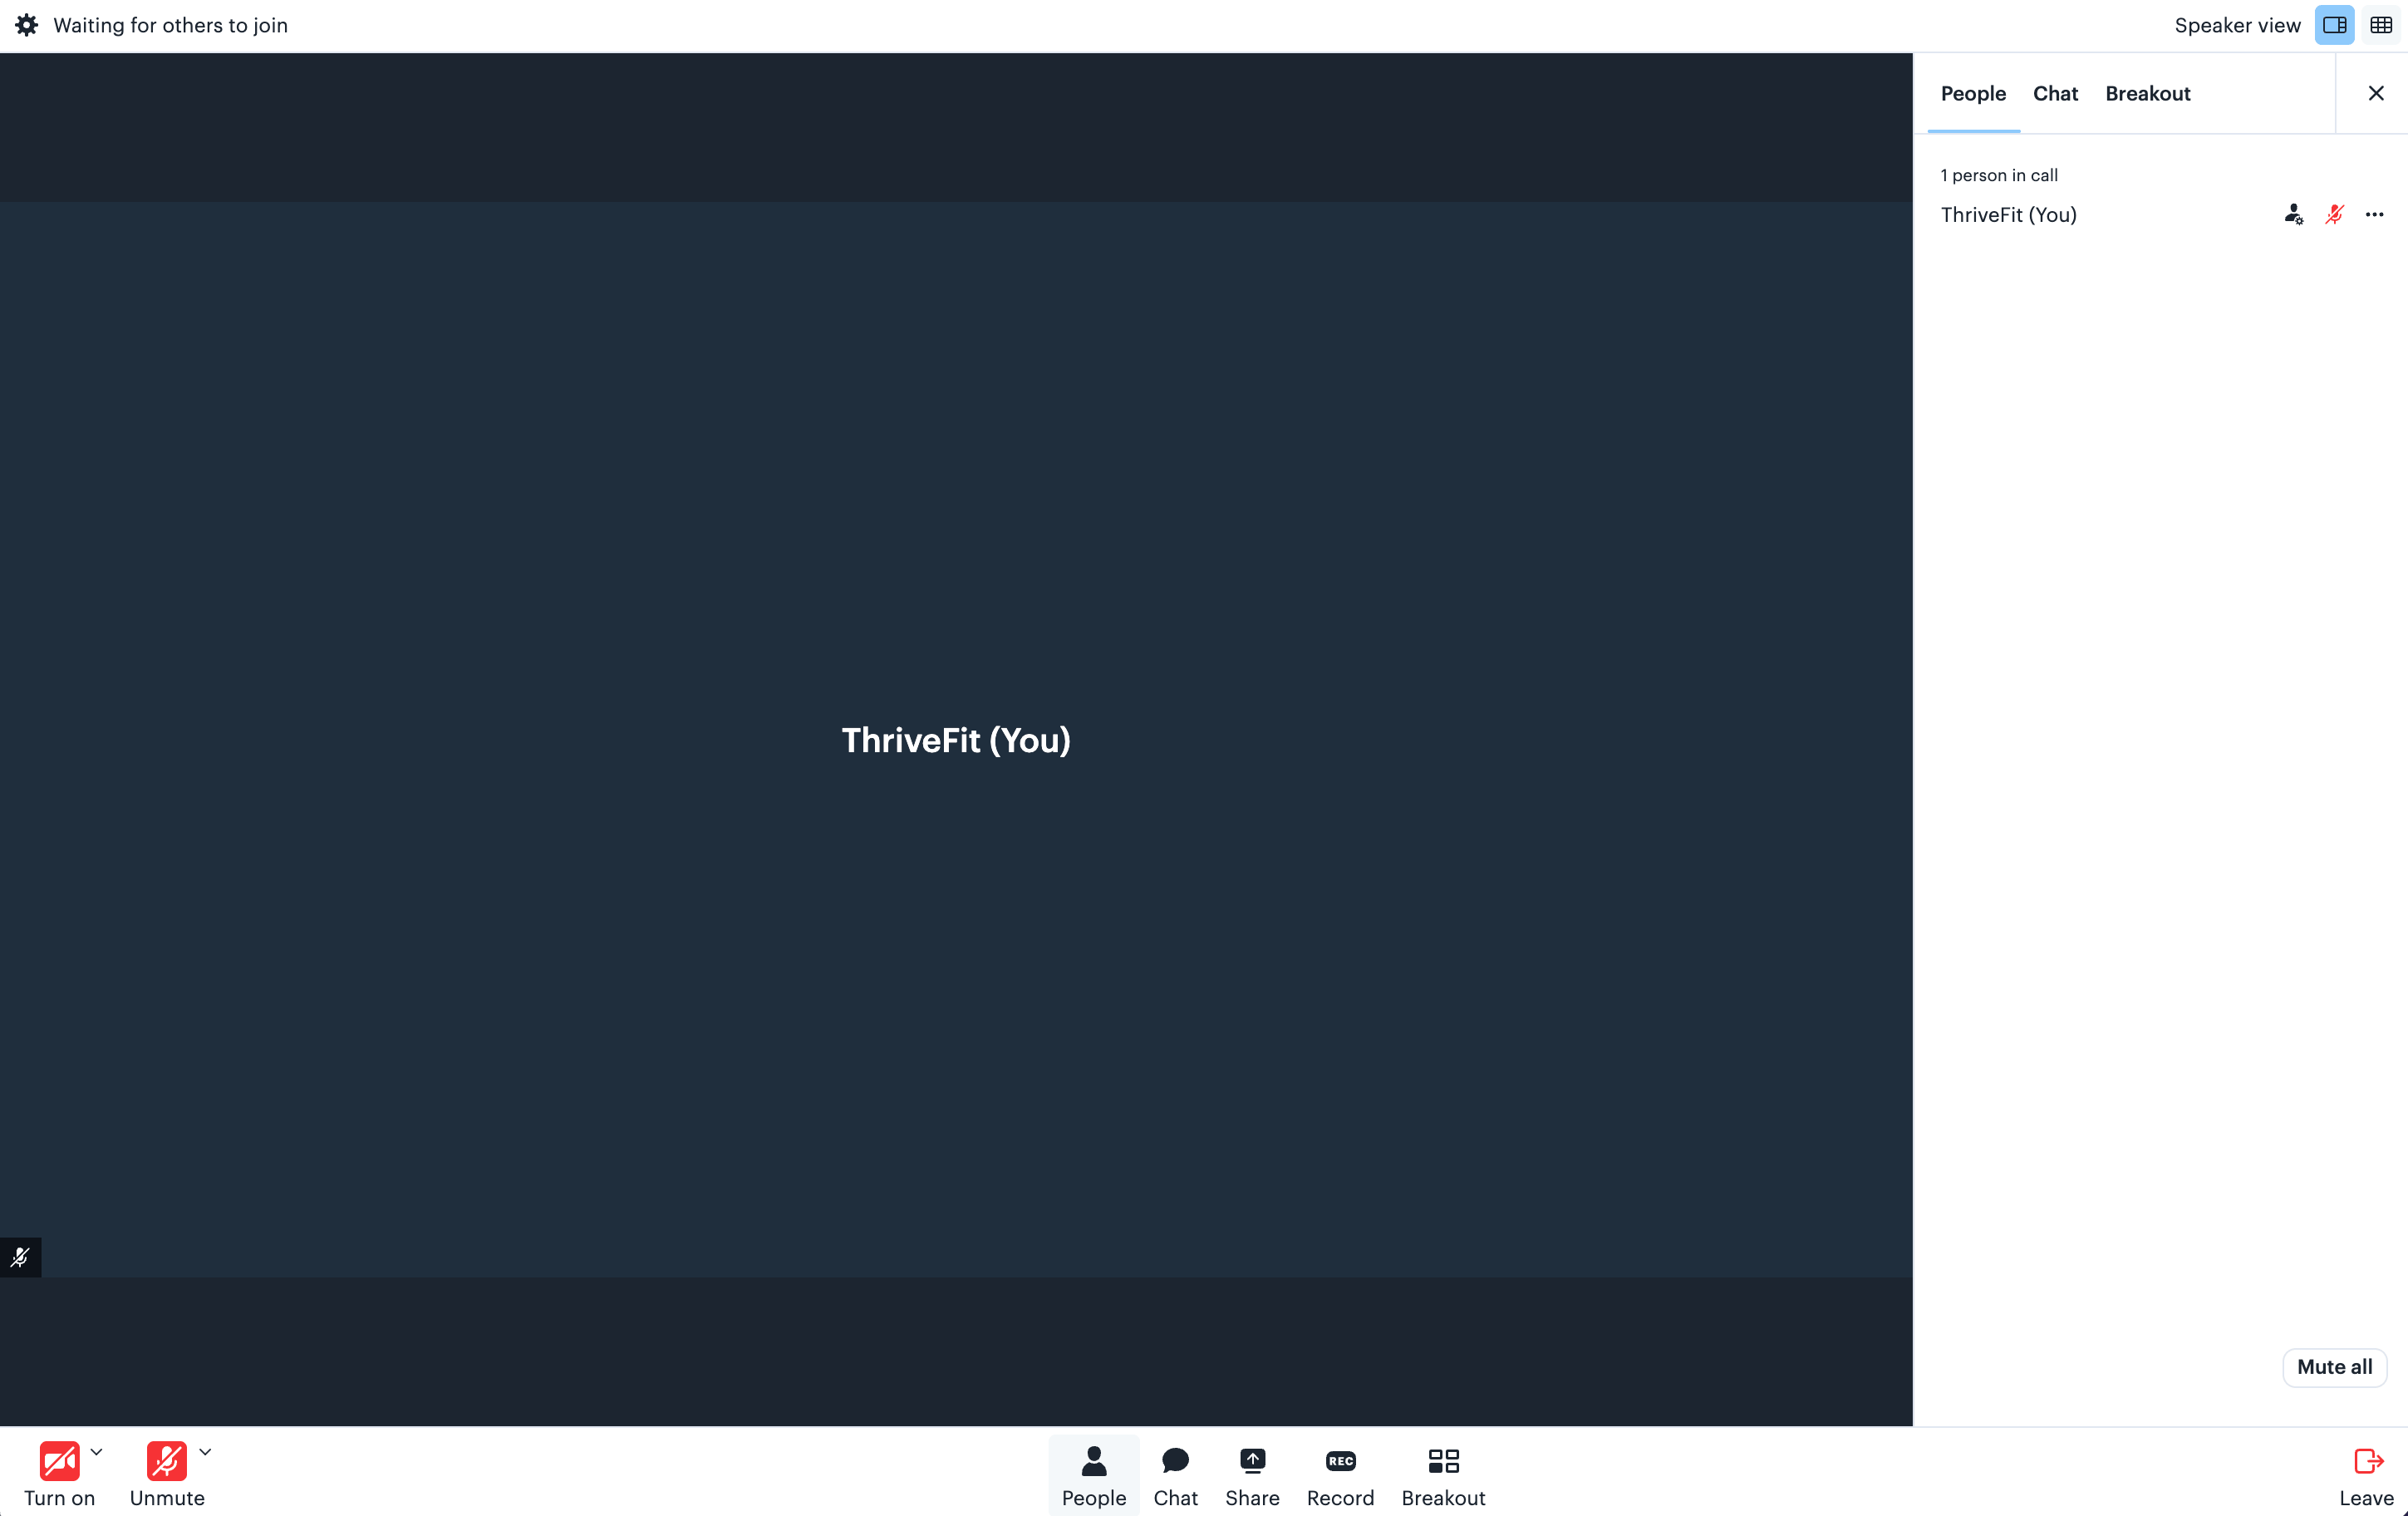
Click **People** to see everyone in the session. Each person has a more options (...) menu for controls that apply to them alone, and **Mute all** mutes every participant at once.
### People
Click **People** to see everyone in the session. Each person has a more options (...) menu for controls that apply to them alone, and **Mute all** mutes every participant at once.
 ### Breakout
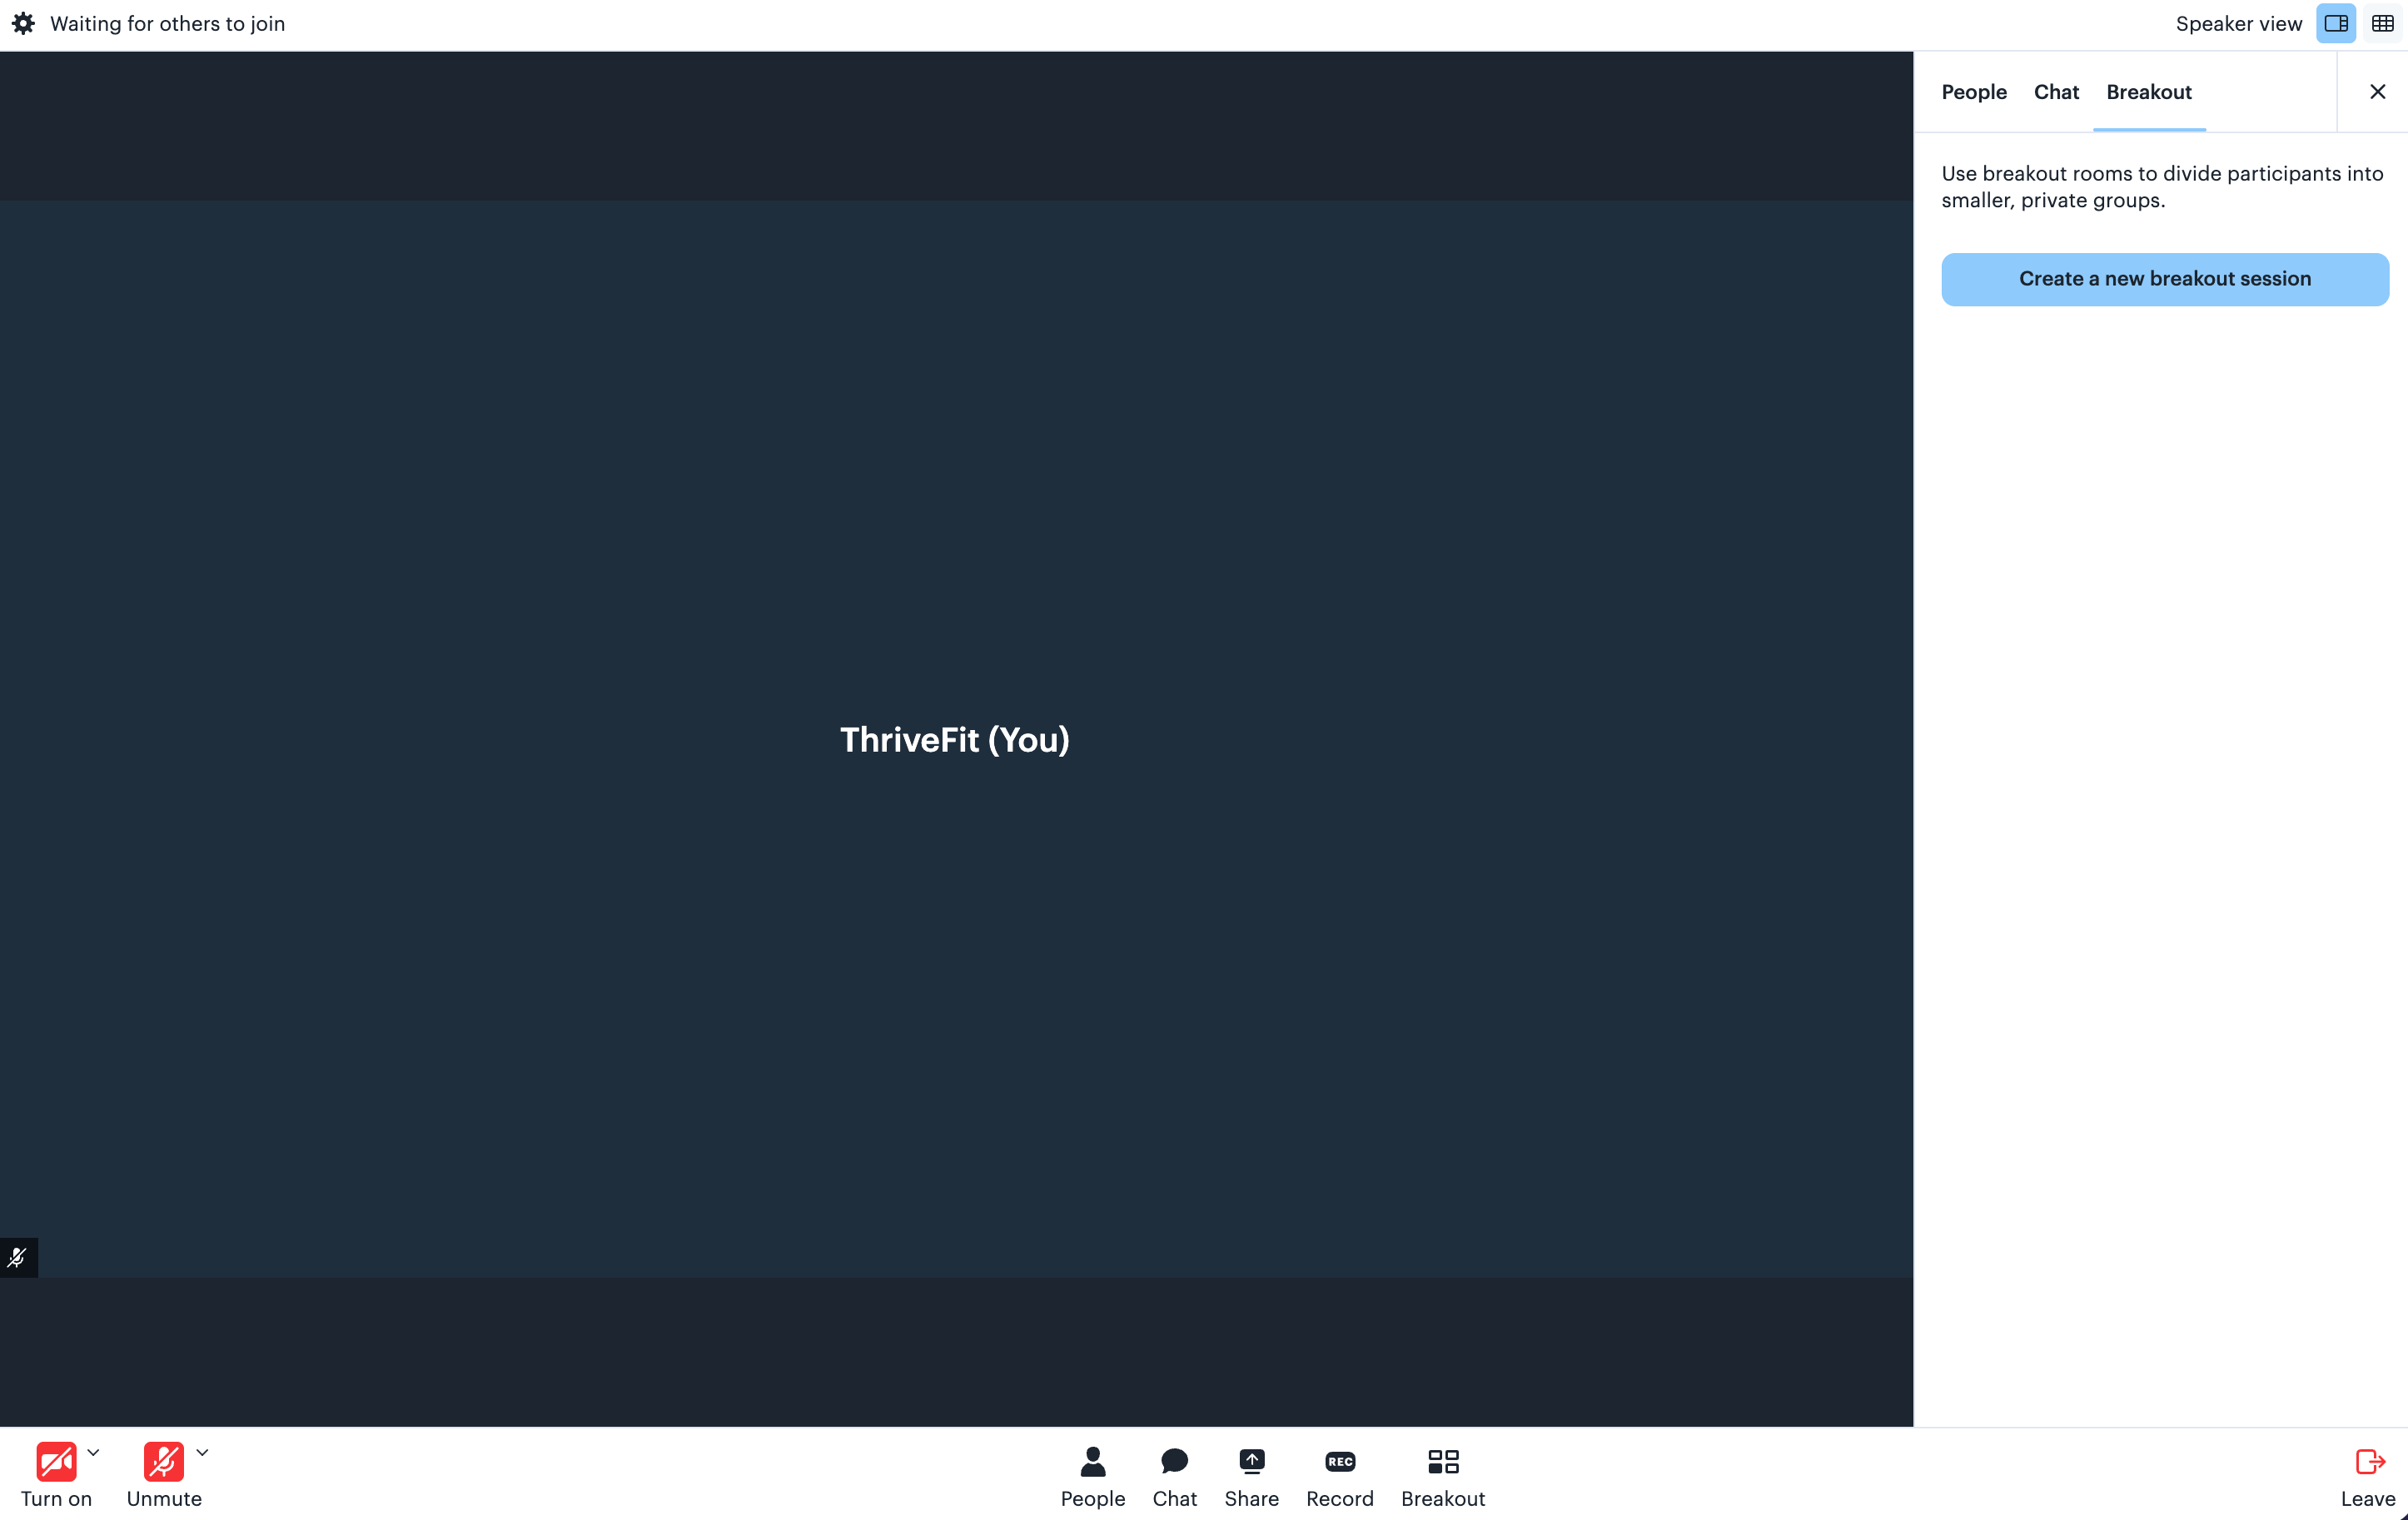
Click **Breakout** to divide your participants into smaller, private groups for small-group discussion. Select **Create a new breakout session** to choose how many rooms you want and assign participants to them.
### Breakout
Click **Breakout** to divide your participants into smaller, private groups for small-group discussion. Select **Create a new breakout session** to choose how many rooms you want and assign participants to them.
 For the full breakout setup, including assigning attendees and ending a breakout session, learn how to [create breakout sessions with Kajabi Live](../../products/coaching/how-to-create-breakout-sessions-with-kajabi-live).
### Leave
Click **Leave** at the bottom right to end your live session.
## Manage Course live video
Manage your course live video by updating the live video session details, copying the session link to share with your customers, or by disabling your live session.
Course Live Video is made possible with the same video software used within Kajabi Communities. If you are having trouble with your live session, [learn how to troubleshoot your live room](../../products/community/troubleshooting-your-live-room).
### Edit live video session details
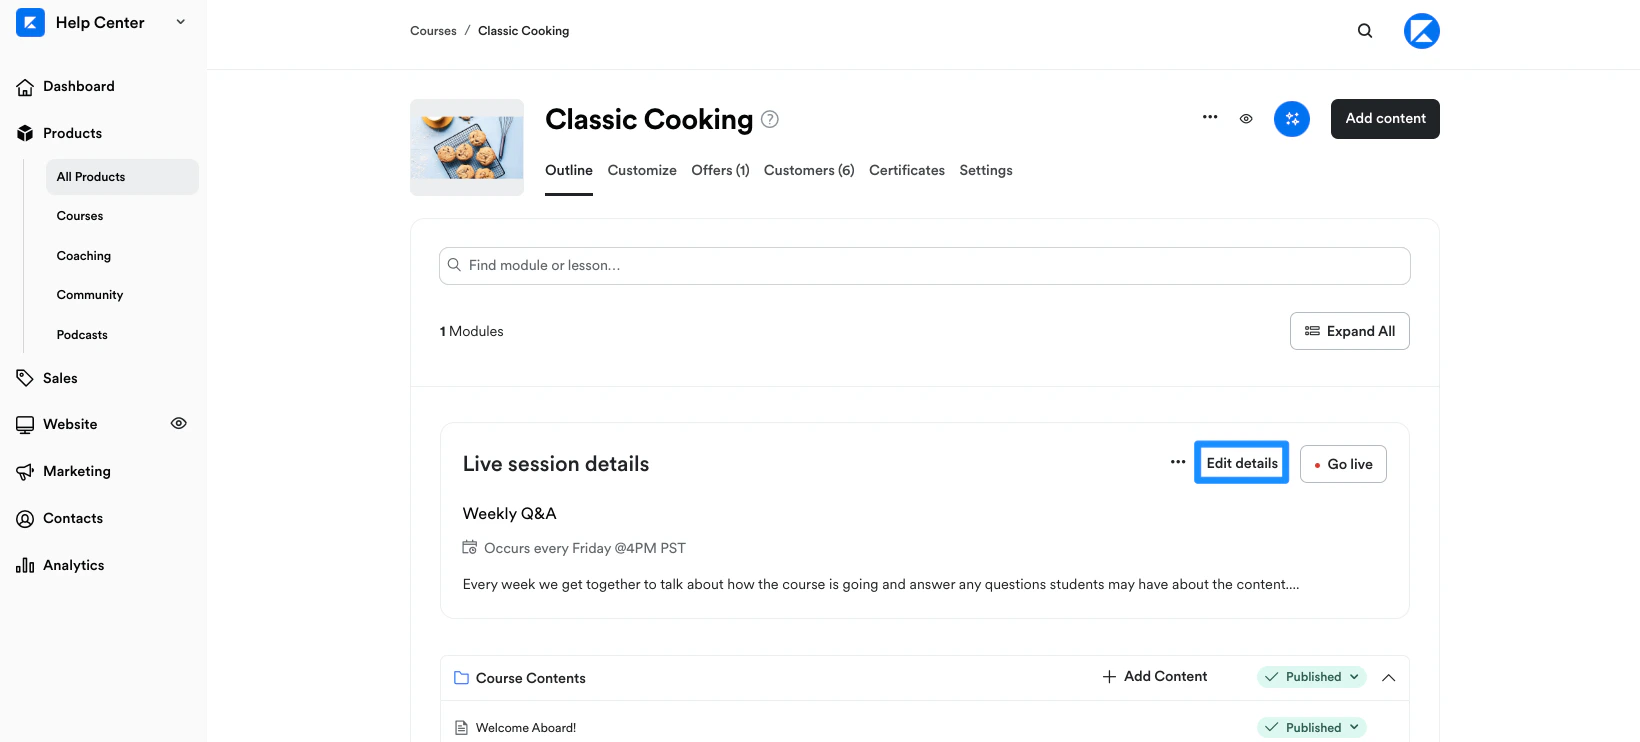
Update your live video session title, description, and schedule:
For the full breakout setup, including assigning attendees and ending a breakout session, learn how to [create breakout sessions with Kajabi Live](../../products/coaching/how-to-create-breakout-sessions-with-kajabi-live).
### Leave
Click **Leave** at the bottom right to end your live session.
## Manage Course live video
Manage your course live video by updating the live video session details, copying the session link to share with your customers, or by disabling your live session.
Course Live Video is made possible with the same video software used within Kajabi Communities. If you are having trouble with your live session, [learn how to troubleshoot your live room](../../products/community/troubleshooting-your-live-room).
### Edit live video session details
Update your live video session title, description, and schedule:
 ### Get session link
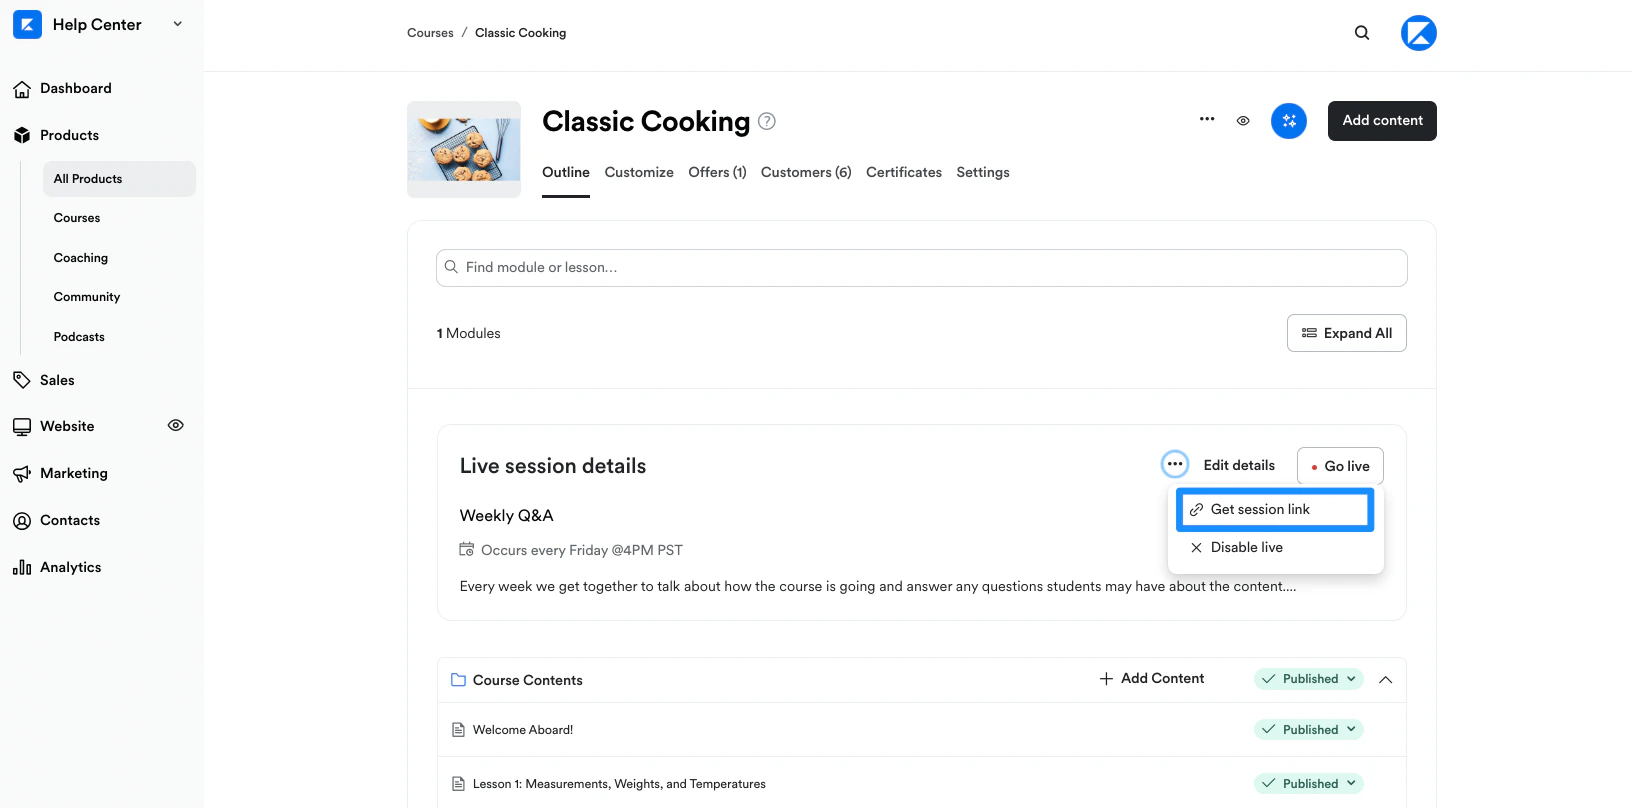
Copy and share your session link and share with your course customers. With your session link, you can create email campaigns for your course customers leading up to your session and include your session link to help your customers join your live session:
### Get session link
Copy and share your session link and share with your course customers. With your session link, you can create email campaigns for your course customers leading up to your session and include your session link to help your customers join your live session:
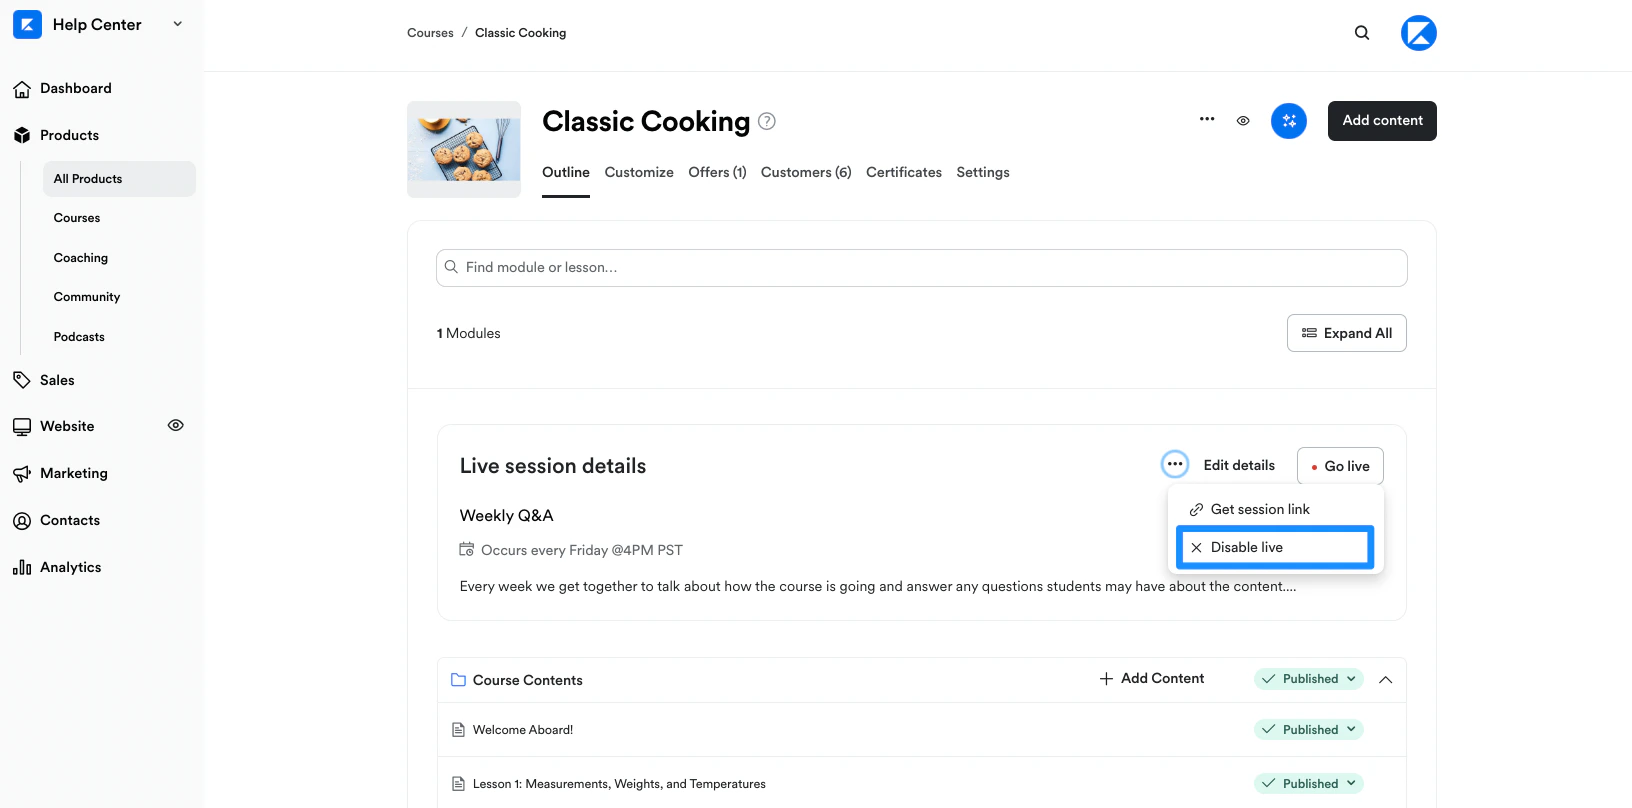
 ### Disable live session
Want to disable and shut down your course live video? Open more details in your live session and select **Disable live**. This will open your Course Settings. Simply toggle off **Provide a live video session for this course** to disable it.
### Disable live session
Want to disable and shut down your course live video? Open more details in your live session and select **Disable live**. This will open your Course Settings. Simply toggle off **Provide a live video session for this course** to disable it.
 ## Using a third-party video platform
If you would like to use a third-party platform to meet live instead of the Go Live feature, you will need to disable it for your course. Then, create a lesson where you add your meeting link in the lesson description box. After that, you can send a Product Announcement to your students who have access to that course, informing them about the lesson and providing the meeting link.
## FAQs
### What happened to the Premium Video setting?
**Premium Video** was a checkbox in your Course settings that switched your live sessions over to Kajabi's own live video system. Every course live session now runs on that system, so the checkbox has been removed and there is nothing to turn on.
### Does anything change for existing live sessions?
Your session title, description, schedule, and recording settings stay as they are, and recordings you have already saved remain available. If your course was not already using Premium Video, your live sessions move to Kajabi's own live video system, so some of the in-session controls look different from what you used before.
## Using a third-party video platform
If you would like to use a third-party platform to meet live instead of the Go Live feature, you will need to disable it for your course. Then, create a lesson where you add your meeting link in the lesson description box. After that, you can send a Product Announcement to your students who have access to that course, informing them about the lesson and providing the meeting link.
## FAQs
### What happened to the Premium Video setting?
**Premium Video** was a checkbox in your Course settings that switched your live sessions over to Kajabi's own live video system. Every course live session now runs on that system, so the checkbox has been removed and there is nothing to turn on.
### Does anything change for existing live sessions?
Your session title, description, schedule, and recording settings stay as they are, and recordings you have already saved remain available. If your course was not already using Premium Video, your live sessions move to Kajabi's own live video system, so some of the in-session controls look different from what you used before.